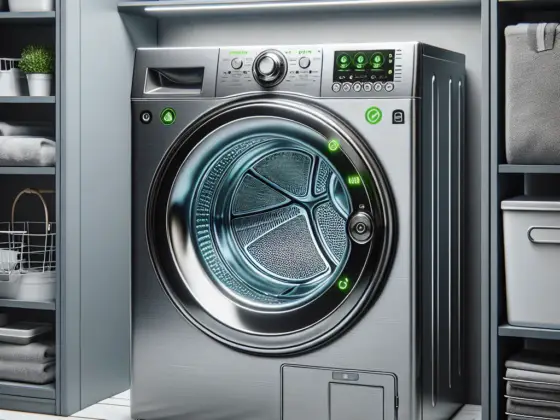
In this article, you will learn how to efficiently and effectively replace the door switch on your Whirlpool dryer. The door switch plays a crucial role in ensuring the safety and functionality of your dryer, as it controls the power supply and prevents operation when the door is open. By following a few simple steps, you will be able to replace the door switch and restore the optimal performance of your Whirlpool dryer without the need for professional assistance.
Understanding the Need for Door Switch Replacement
Recognizing symptoms of a faulty switch
When your Whirlpool dryer’s door switch begins to malfunction, there are several symptoms you may notice. One common sign is that the dryer won’t start when you press the start button. Additionally, the dryer may start but immediately stop as soon as you release the start button. Another indication of a faulty door switch is if the light inside the dryer drum fails to turn on when you open the door. These symptoms all point to a potential issue with the door switch, and it’s important to take action to address it promptly.
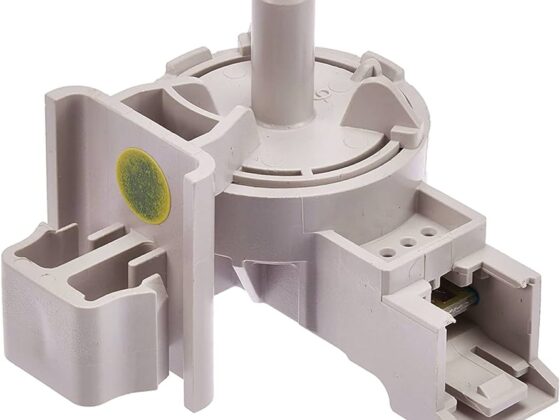
Understanding the function of the switch
The door switch plays a crucial role in the operation of your Whirlpool dryer. When the door is closed, the switch activates and allows the dryer to start. It serves as a safety mechanism to prevent the dryer from running when the door is open, avoiding any potential accidents. The switch also controls the interior light in the dryer drum, ensuring that it turns on when the door is opened and off when the door is closed. Without a properly functioning door switch, the dryer cannot operate effectively and safely.
Identifying safety risks of a faulty switch
A faulty door switch can pose safety risks if left unaddressed. When the switch fails, there is a chance that the dryer can start even when the door is open. This can lead to accidents, such as injury from contact with the moving drum or entanglement in the clothes. Additionally, if the interior light fails to turn on when the door is opened, it can create a hazardous environment, as you may not be able to see clearly inside the dryer. Understanding these safety risks emphasizes the importance of replacing a faulty door switch in a timely manner.
Gathering the Necessary Tools and Materials
Listing required tools
Before beginning the door switch replacement process, it’s important to gather the necessary tools. You will need a Phillips screwdriver to remove screws, needle-nose pliers to handle wires, and a multimeter to test the continuity of the switch. Having these tools readily available will make the replacement process more efficient and ensure that you have everything you need to successfully complete the task.
Deciding on Original Equipment Manufacturer (OEM) or aftermarket part
When it comes to purchasing a replacement door switch for your Whirlpool dryer, you have the option of choosing between an Original Equipment Manufacturer (OEM) part or an aftermarket part. An OEM part is manufactured by Whirlpool and is an exact match to the original switch that came with your dryer. On the other hand, an aftermarket part is produced by a third-party manufacturer. While aftermarket parts may be more affordable, they may not always meet the same quality and standards as OEM parts. It is recommended to choose an OEM part to ensure compatibility and reliability.
Locating a reputable source for a replacement switch
To ensure you are purchasing a genuine and high-quality replacement door switch, it is essential to find a reputable source. Whirlpool’s official website is a reliable option for obtaining OEM parts, as they guarantee authenticity and compatibility. Additionally, authorized retailers and online marketplaces with positive customer reviews can provide trustworthy sources for replacement switches. It is crucial to avoid purchasing from unauthorized sellers or questionable sources to ensure the quality and reliability of the replacement switch.

Locating and Accessing the Door Switch
Describing the location of the switch
The door switch on a Whirlpool dryer is typically located near the top of the dryer’s front panel. To find it, you need to open the dryer door and look for a small switch mechanism that is activated when the door is closed. It may be positioned on the top or bottom edge of the dryer opening, depending on the specific model. Familiarize yourself with the location of the switch before proceeding with the replacement process.
Explaining how to access the switch
Accessing the door switch requires removing the dryer’s front panel. Start by unplugging the dryer from the power supply to ensure safety. Next, locate and remove the screws that secure the front panel to the rest of the dryer. These screws are typically located at the top or bottom corners of the front panel. Once the screws are removed, gently pull the front panel forward to detach it from the dryer’s cabinet. This will expose the door switch, allowing you to proceed with the replacement.
Tips for handling appliance parts with care
While accessing the door switch, it is important to handle all appliance parts with care to avoid damage. Avoid using excessive force when removing screws or detaching the front panel to prevent any unintended breakage. Take note of the location and orientation of each screw, as this will make reassembly easier. Additionally, be cautious when handling wires and connectors, as they can be delicate. Use needle-nose pliers to grip and remove wire harnesses, ensuring a gentle yet secure grip. Treating all parts with care will contribute to a smooth and successful door switch replacement.
Disconnecting the Dryer from Power Supply
Detailing the steps to unplug the appliance
Before proceeding with any repairs, it is vital to disconnect the dryer from the power supply to eliminate the risk of electric shock. Locate the dryer’s power cord and unplug it from the electrical outlet. If the dryer is hardwired, locate the circuit breaker or fuse that controls the power supply and switch it off. Confirm that the power is completely disconnected by trying to turn the dryer on. An additional precautionary measure is to place a “Do Not Use” sign on the dryer to alert others that it is undergoing maintenance.
Highlighting the importance of power disconnection
Disconnecting the dryer from the power supply is of utmost importance when working on any electrical components to ensure personal safety. Failure to disconnect the power can lead to severe electric shock or electrocution. The door switch replacement process requires accessing and handling wires, which increases the risk of electrical contact. By unplugging the dryer or turning off the circuit breaker, you are effectively removing the power source and minimizing these risks.
Addressing potential risks of not disconnecting power
Failing to disconnect the dryer from the power supply can result in serious consequences. Without disconnecting power, there is a chance of unintentional activation of the dryer, causing the drum to start rotating. This can lead to accidental injury or entanglement with the rotating drum or moving parts. The absence of power disconnection also increases the potential for electrical shock or burns when working with wires or connectors. Understanding the risks associated with not disconnecting power emphasizes the importance of following proper safety procedures during the replacement process.
Removing the Dryer’s Front Panel
Describing the process
Once the dryer is safely disconnected from the power supply, you can proceed with removing the front panel to access the door switch. Start by locating the screws that secure the front panel to the rest of the dryer’s cabinet. These screws are typically located at the top or bottom corners of the panel. Use a Phillips screwdriver to remove the screws, keeping them in a safe location for reassembly later. Once the screws are removed, carefully pull the front panel forward to detach it from the cabinet. Take extra care not to let the panel fall or get damaged during this step.
Discussing the potential hurdles
Removing the dryer’s front panel may involve some challenges depending on the specific model and age of the appliance. Common hurdles include stubborn or rusted screws that may be challenging to unscrew. In such cases, applying penetrating oil to the screws and allowing it to sit for a few minutes can make them easier to loosen. Additionally, some models may have clips or hooks that secure the front panel instead of screws. Take the time to examine your specific dryer model and consult the user manual for any additional instructions or insights into the removal process.
Sharing tips to make this process easier
To make the process of removing the front panel easier, it is advisable to use a magnetic screwdriver. This will help prevent the screws from falling into hard-to-reach areas and save time when reassembling the dryer. Keeping track of the order and positioning of the screws will also simplify the reassembly process. Taking clear pictures or drawing diagrams can serve as visual references during reinstallation. Furthermore, having an extra set of hands can be beneficial, especially when removing the front panel, as it can be bulky and awkward to handle alone.