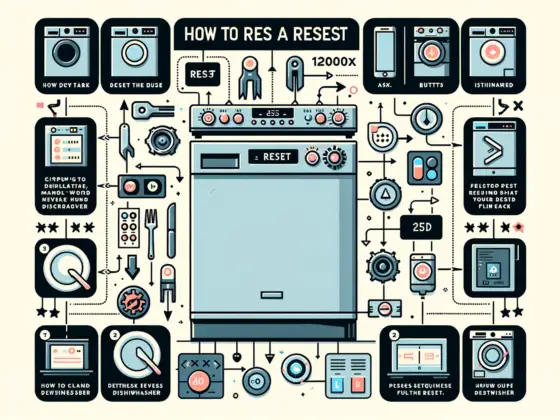
In this article, you will learn the step-by-step process of resetting a GE Washer. Whether you’re dealing with a malfunctioning control panel or a stuck cycle, knowing how to reset your GE Washer can save you time and frustration. We will guide you through the necessary actions to reset your washer, ensuring that you can quickly resume your laundry routine. Follow these instructions carefully to effectively troubleshoot and resolve common issues with your GE Washer.
Understanding the Need to Reset a GE Washer
Common issues that require a reset
Resetting a GE washer can be a practical solution for common issues that may arise with the appliance. Some of the problems that can be resolved by performing a reset include the washer not starting, malfunctioning or unresponsive buttons, error codes displayed on the control panel, or when the washer gets stuck in a specific cycle. By performing a reset, you can effectively troubleshoot these issues and restore the normal functioning of your GE washer.
When to consider resetting the washer
If you encounter any of the aforementioned issues with your GE washer, it is advisable to consider performing a reset before seeking professional assistance. Resetting the washer is often the first step recommended by GE and can save you time and money. Additionally, if you have recently made any changes to the settings or if the washer has experienced a power surge, a reset may also be necessary to recalibrate the appliance and resolve any resulting issues.
Benefits of resetting a GE washer
Performing a reset on your GE washer can offer several benefits. Firstly, it is a cost-effective solution that can potentially save you from incurring repair expenses or having to replace the appliance altogether. Secondly, it allows you to troubleshoot common issues quickly and conveniently, without having to wait for a technician to arrive. Additionally, resetting the washer can help maintain the longevity of your appliance by resolving minor glitches and preventing further damage caused by prolonged use with unresolved issues.
Preparing for a Washer Reset

Gathering the necessary tools and materials
Before proceeding with a washer reset, it is essential to have the necessary tools and materials for a smooth and safe process. In most cases, a washer reset can be performed without the need for any specific tools. However, it is always a good idea to keep the owner’s manual or manufacturer’s guidelines readily available for reference during the reset process. This will ensure that you have all the required information at your disposal.
Ensuring safety precautions
While resetting a GE washer is generally a safe procedure, it is important to exercise caution and follow safety precautions. Ensure that the washer is not operating and is disconnected from the power source before attempting any reset. This will eliminate the risk of electrical shock or injury. Additionally, if any water is present in the washer, ensure that it is drained or removed prior to resetting the appliance. Taking these safety measures will help protect both you and the washer from any potential harm.
Understanding the manufacturer’s guidelines
To ensure a successful reset, it is crucial to familiarize yourself with the manufacturer’s guidelines for your specific GE washer model. These guidelines can be found in the owner’s manual or on the GE website. Understanding the specific reset instructions for your model will help you navigate through the process more effectively and avoid any mistakes or confusion. It is important to follow the recommended steps precisely to achieve the desired results and avoid any unnecessary complications.
Resetting a GE Washer: Basic Steps
Step 1: Turn off the washer
Before resetting a GE washer, the first step is to ensure that the appliance is turned off. This can usually be done by pressing the power button or rotating the cycle selector knob to the “Off” position. Make sure that the washer is completely powered down before proceeding to the next step.
Step 2: Unplug the washer from the power source
For safety purposes, it is necessary to unplug the GE washer from the power source. This can typically be done by unplugging the power cord from the electrical outlet. Ensure that there are no active electrical connections to the washer to prevent any potential electrical hazards during the reset process.
Step 3: Wait for a few minutes
After unplugging the washer, it is important to allow it to sit idle for a few minutes. This waiting period allows the washer’s internal components to fully power down and discharge any residual electricity. Waiting for a minimum of three to five minutes is generally sufficient to ensure a successful reset.
Step 4: Plug the washer back in
Once the waiting period is over, plug the GE washer back into the power source. Ensure that the power cord is securely inserted into the electrical outlet. Double-check that the washer is properly connected to the power supply before moving on to the next step.
Step 5: Select the desired reset option
GE washers offer various reset options, depending on the model and specific features of the appliance. Refer to the manufacturer’s guidelines to identify the appropriate reset option for your washer. This may involve pressing a specific button or a combination of buttons on the control panel. Select the reset option that is recommended for your specific model.
Step 6: Start the reset process
After selecting the desired reset option, initiate the reset process by pressing the corresponding button or following the instructions provided in the manufacturer’s guidelines. The washer may display some indicators or perform specific actions to indicate that the reset is in progress. Allow the reset process to complete, which may take a few minutes.
Resetting a GE Washer with Specific Buttons
Using the ‘Reset’ button
Some GE washer models have a designated ‘Reset’ button on the control panel. To perform a reset using this button, ensure that the washer is turned off and unplugged. Once it is plugged back in, press the ‘Reset’ button and hold it for a few seconds until the washer beeps or the display shows signs of resetting. Release the button and allow the reset process to complete.
Using the ‘Delay Start’ button
If your GE washer has a ‘Delay Start’ button, you can utilize this feature to perform a reset. Start by turning off the washer and unplugging it. After plugging it back in, press and hold the ‘Delay Start’ button for a few seconds until the washer beeps or enters reset mode. Let go of the button and wait for the reset process to finish.
Using the ‘Signal’ or ‘Volume’ button
In certain GE washer models, the ‘Signal’ or ‘Volume’ button can be utilized to initiate a reset. Begin by ensuring that the washer is powered off and disconnected from the power source. Once it is plugged back in, press and hold the ‘Signal’ or ‘Volume’ button until the washer responds with a beep or shows signs of initiating the reset. Allow the reset process to complete before proceeding.
Performing a Hard Reset on a GE Washer
When to do a hard reset
If the basic reset procedures do not resolve the issues with your GE washer, a hard reset may be necessary. This method is typically employed when the washer is completely unresponsive or experiencing severe technical problems. Performing a hard reset erases all saved settings, preferences, and configurations, effectively restoring the washer to its default factory state.
Identifying the specific procedure for your model
The process for performing a hard reset may vary depending on the model of your GE washer. It is essential to refer to the owner’s manual or manufacturer’s guidelines to identify the specific procedure for your particular model. The instructions provided by GE will guide you through the step-by-step process to ensure a successful hard reset without causing any damage to the washer.
Following the step-by-step instructions
Once you have identified the correct procedure, follow the provided step-by-step instructions to perform a hard reset on your GE washer. Typically, this involves pressing and holding a combination of buttons for a predetermined duration or following a specific sequence of actions. Make sure to carefully execute each step and allow the washer to complete the hard reset process before attempting further troubleshooting or usage.
Resetting a GE Washer through Diagnostic Mode
Understanding the purpose of diagnostic mode
Diagnostic mode in a GE washer is a feature that allows users or technicians to assess and troubleshoot specific issues with the appliance. By entering diagnostic mode, you can access various diagnostic options, including the ability to perform a reset. This mode provides a more advanced and in-depth approach to addressing complex problems that the standard reset procedures may not resolve.
Accessing the diagnostic mode
The process of entering diagnostic mode varies depending on the model of your GE washer. Consult the owner’s manual or manufacturer’s guidelines to determine the specific method for your appliance. Typically, it involves a combination of button presses or a specific procedure to access the diagnostic mode. Once in diagnostic mode, you can navigate through the available options to perform a reset.
Navigating through diagnostic options
Once you have accessed the diagnostic mode, navigate through the available options using the designated buttons or controls on the washer. Look for the reset option within the diagnostic menu. The exact location and labeling of this option may differ depending on the model. Follow any prompts or instructions provided on the control panel to initiate the reset process through diagnostic mode.
Executing the reset function
Upon locating the reset option within the diagnostic mode, execute the function by pressing the corresponding button or following the provided instructions. The washer may display specific indicators or perform certain actions to indicate that the reset is in progress. Allow the reset process to complete before exiting the diagnostic mode. Ensure that you follow any specified steps for exiting the diagnostic mode to prevent accidental changes to the washer’s settings.
Common Challenges and Troubleshooting Tips

The washer does not respond to the reset
If your GE washer does not respond to the reset procedure, there are a few troubleshooting tips you can try. Firstly, double-check that the washer is properly plugged in and connected to the power source. Check the electrical outlet for any issues, such as a tripped circuit breaker or a blown fuse. Additionally, ensure that the power cord is in good condition and securely inserted into the outlet. If the washer still does not respond, it may require professional assistance or further diagnosis.
The reset does not fix the issue
In some cases, performing a reset may not resolve the underlying problem with your GE washer. If this occurs, it is recommended to consult the owner’s manual or manufacturer’s guidelines for additional troubleshooting steps. These resources often provide specific instructions or recommendations depending on the issue you are facing. If the problem persists, it is advisable to contact the GE customer service or a certified technician for further assistance.
Technical support and contacting GE customer service
If you require technical support or need to contact GE customer service regarding your washer, it is best to have the appliance’s model number and serial number on hand. These details can usually be found on the identification label located on the back of the washer or inside the door frame. Having this information readily available will help expedite the troubleshooting or assistance process.
Maintaining a Well-Functioning GE Washer
Regular cleaning and maintenance
To ensure that your GE washer continues to function optimally, regular cleaning and maintenance are crucial. Clean the drum, detergent dispensers, and other parts of the washer regularly to prevent the buildup of dirt, debris, or detergent residue. Additionally, check and clean the drain pump filter periodically to prevent clogging. Following the manufacturer’s guidelines for maintenance tasks, such as descaling or inspecting hoses, can also contribute to a well-functioning washer.
Avoiding common mistakes
To avoid any unnecessary problems with your GE washer, it is important to avoid common mistakes that may hinder its performance or cause damage. Follow the recommended loading capacity and avoid overloading the washer, as this can strain the machine and potentially lead to malfunctions. Use the appropriate amount of detergent and avoid using excessive fabric softener or bleach, as this can leave residue and affect the washer’s efficiency.
Knowing when to seek professional assistance
While resetting a GE washer can resolve many common issues, there may be instances when professional assistance is required. If you encounter persistent problems, unusual noises, leaks, or any other issues that you cannot resolve through basic troubleshooting, it is advisable to seek assistance from a certified technician. Only a trained professional will have the expertise to diagnose and repair complex problems, ensuring the longevity and optimal performance of your GE washer.
Conclusion
The importance of knowing how to reset a GE washer cannot be overstated. By understanding the need for a reset, preparing for the reset process, and following the appropriate steps, you can effectively troubleshoot common issues and maintain a well-functioning appliance. Taking advantage of the various reset options available, such as using specific buttons, performing a hard reset, or utilizing diagnostic mode, offers flexibility in addressing different types of problems. By following the recommended guidelines and seeking professional assistance when necessary, you can ensure a long lifespan for your GE washer and enjoy its efficient performance for years to come.