The Game Changer for Freshness: Ever opened your freezer to find freezer-burned steak or wilted veggies? Say goodbye to wasted food and hello to prolonged freshness! If you’re wondering how to use a vacuum sealer, you’re in the right place. Dive in to discover the secrets of sealing, ensuring your food remains as tantalizingly fresh as the day you bought it.
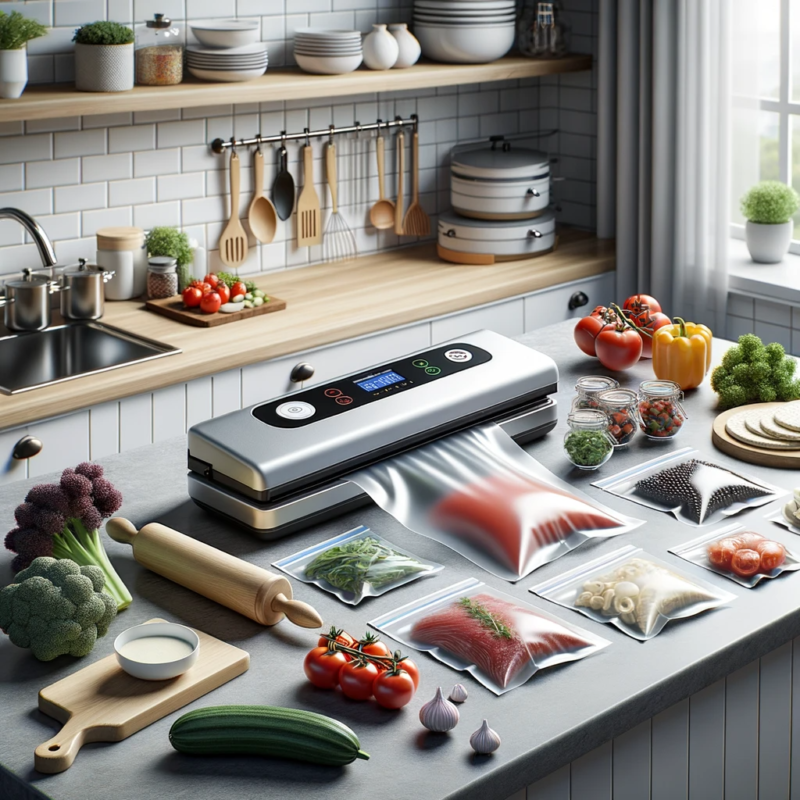
Getting Started with Your Food Saver Vacuum Sealer
Embarking on your Food Saver Vacuum Sealer journey ensures your food remains fresh and flavorsome for longer periods. But to truly harness its benefits, understanding its components and initial setup is key. Dive in to get started:
Unboxing Your Food Saver: Contents and Initial Checks
Upon receiving your Food Saver Vacuum Sealer, the thrill of enhanced food preservation awaits. Here’s what you should do:
- Inspect the Outer Packaging: Before delving in, ensure the package is undamaged. Any external dents might suggest internal harm to your vacuum sealer.
- Contents Overview: Generally, your package will house the vacuum sealer unit, vacuum seal bags or rolls, an accessory hose for specialized sealing tasks, and a crucial user manual. Some premium models might also feature added accessories or bag cutters.
- Keep the Manual Handy: This isn’t just paperwork—it’s a treasure trove of insights tailored to your specific Food Saver model. A quick perusal can highlight any special features or precautions.
Setting Up Your Vacuum Sealer: First-Time Powering and Configuration
Transitioning from unboxing to sealing shouldn’t be a hassle. Here’s a step-by-step guide:
- Ideal Positioning: Ensure your Food Saver Vacuum Sealer sits on a level, sturdy surface. Adequate space ensures effective ventilation and operational safety.
- Connecting to Power: Use a direct power outlet connection. This minimizes electrical disruptions and guarantees stable operation.
- First Power-On: Activate your vacuum sealer. Some advanced models may offer an initial testing or calibration mode. This not only confirms its functionality but sets the stage for consistent sealing performance.
Anatomy of Your Vacuum Sealer: Recognizing Key Components
A brief overview of your machine’s primary components will ensure efficient and safe usage:
- The Sealing Magic – Sealing Bar: This heated component is the heart of the operation, effectively sealing your vacuum bags for an airtight finish.
- Where Air Exits – Vacuum Chamber: A designated slot or cavity, this is where the bag’s open end goes. The chamber’s job? Extracting air to ensure vacuum efficiency.
- Command Center – Control Buttons: These buttons, though varying with models, usually include functions like ‘Seal Only’, ‘Vacuum & Seal’, and settings tailored for specific food textures, such as ‘Dry’ or ‘Moist’. A thorough understanding of these controls will elevate your sealing game.
Essential Pre-Sealing Tips for Optimal Use of Your Food Saver Vacuum Sealer
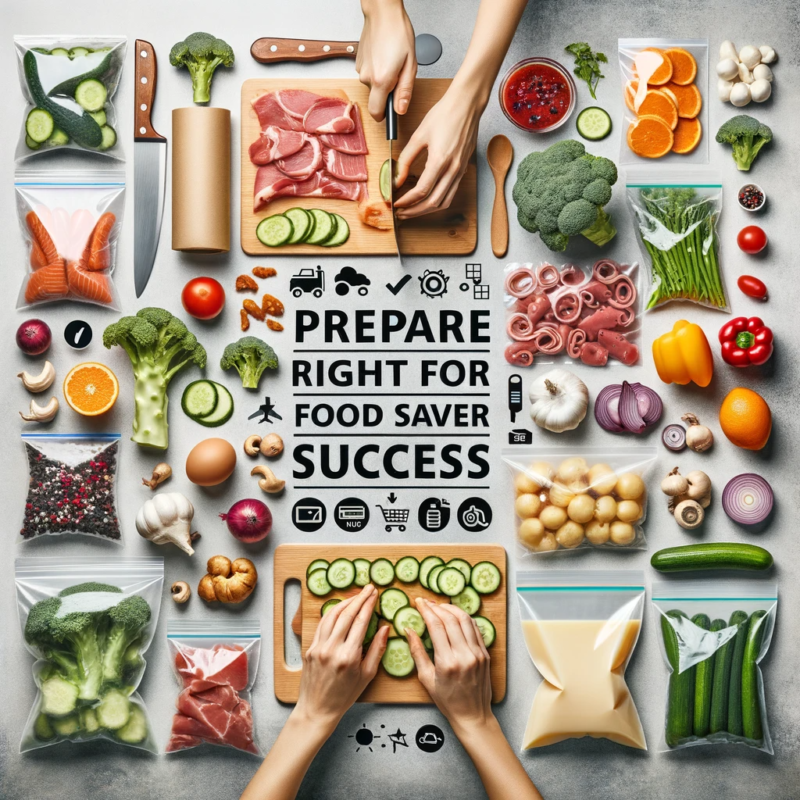
To achieve the ultimate freshness and longevity of your stored food, understanding the preparatory steps is pivotal. Each step ensures a seamless sealing process, optimizing the benefits of your Food Saver Vacuum Sealer.
Choosing the Right Bags: Tailored for Every Sealing Task
The efficiency of your sealing endeavor significantly depends on the type of bag you opt for:
- Pre-Cut vs. Rolls:
- Pre-Cut Bags: Ready-to-use and available in multiple sizes, these are perfect for those who prefer convenience and consistency.
- Rolls: Ideal for those looking for flexibility. Customize the length based on the food item, ensuring minimal wastage of bag material.
- Specialty Bags for Specific Needs:
- Wine Bottle Sealers: Specifically designed for sealing opened wine bottles, ensuring the wine retains its character.
- Zipper Bags: Best for foods you access frequently. The zippers make them reusable and perfect for items like cheese or deli meats.
- Quality Over Everything: It’s vital to select bags intended for vacuum sealing. Their design ensures maximum air extraction, durability, and safety for varied temperatures.
Food Preparation: Setting the Stage for Perfection
Preparing food appropriately ensures its quality is maintained post-sealing:
- Cleaning and Sanitizing:
- Fruits and Veggies: Wash thoroughly to remove any pesticides or dirt. This simple step significantly enhances food safety.
- Meats and Fish: Clean and pat dry. This ensures a better sealing process and reduces bacterial risks.
- Portioning and Sizing:
- Meal Planning: Consider portion sizes for meals. This reduces food wastage and ensures efficient bag usage.
- Bulk Sealing: If sealing in bulk, label bags with quantities for easier identification later.
- Special Treatments for Specific Foods:
- Anti-Browning Solutions: A quick dip in lemon water can prevent certain fruits, like apples, from browning.
- Blanching Veggies: This helps maintain color, texture, and nutritional value when freezing.
Avoiding Overfilling: Maximizing Vacuum Efficiency
An optimal sealing process requires the right amount of food in each bag:
- The Space Rule:
- Leaving Room: Always leave a gap of about three inches at the bag’s top. This ensures the vacuum mechanism works effectively.
- Distribution Techniques:
- Even Placement: Spread food uniformly in the bag. This ensures even vacuuming and prevents potential sealing issues.
- Handling Liquids:
- Pre-Freezing: For liquid-rich foods, a brief freezing session before sealing can prevent the vacuum from extracting the liquid.
A Step-by-Step Guide to Sealing
Positioning the Food: Proper Alignment and Positioning in the Bag
Vacuum sealing is as much an art as it is a science. Properly positioning your food ensures not only an effective seal but also the integrity of the food when you decide to consume it later.
- Lay out your bag: Flatten your sealing bag on a clean surface, ensuring there are no folds or creases.
- Fill the bag: Place your food items inside, ensuring they don’t overlap or stack too high. This allows the vacuum to work efficiently.
- Leave space at the top: Always leave at least 3 inches of space between the contents and the opening of the bag. This ensures the bag can be sealed properly without any interference from the food.
Using the Machine: Detailed Instructions from Start to Finish
The Food Saver vacuum sealer is designed for ease of use, but there are certain steps you should follow for optimal results:
- Power up: Ensure the machine is plugged in and switched on.
- Place the open end of the bag: Insert the open end of the bag into the vacuum channel. The bag should be centered with the opening extending slightly beyond the sealing strip.
- Close the lid: Press down on both sides of the lid until you hear a click, indicating it’s securely locked.
- Choose the mode: Depending on your machine’s model, select the appropriate mode (e.g., ‘Dry’ for non-liquids, ‘Moist’ for wet foods).
- Start the sealing process: Press the ‘Vacuum & Seal’ button. The machine will remove air and then automatically seal the bag.
- Release and remove: Once the sealing process is complete, release the latch or button that locks the lid and remove your now perfectly vacuum-sealed food.
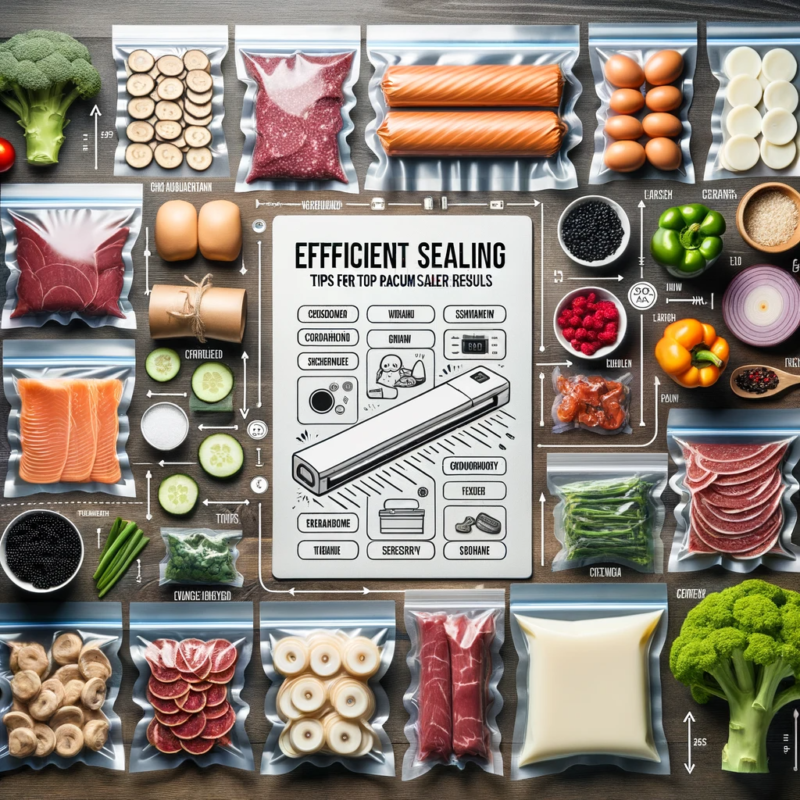
Ensuring a Tight Seal: Tips to Guarantee the Best Seal Every Time
Achieving a perfect seal every time isn’t just about operating the machine correctly; it’s also about the little things that can make a big difference.
- Keep bags smooth: Ensure there are no wrinkles, especially at the top where the seal will be formed.
- Wipe away moisture: If sealing moist foods, wipe away any excess moisture from the top inside of the bag before sealing.
- Double seal for safety: After the initial seal is formed, move the bag slightly and create a second seal. This ensures an extra layer of protection.
- Avoid overfilling: Overfilled bags may not seal properly. If unsure, always remove some content and try sealing again.
- Regularly check the sealing strip: Ensure it’s clean and free from food debris, as this can interfere with the sealing process.
Maximizing the Efficiency of Your Vacuum Sealer
Food preservation and storage have evolved significantly over the years. Today, vacuum sealing stands at the forefront of this evolution, offering a scientifically-proven method to prolong the shelf life of food products. To harness the full potential of this technology, one must understand the nuances and best practices associated with vacuum sealing.
Batch Processing: Sealing Multiple Items for Efficiency
The Science Behind Batch Processing: Vacuum sealing works by removing air, and consequently oxygen, from the packaging. Oxygen is a primary factor in food spoilage, as it supports microbial growth and contributes to oxidation. By sealing multiple items in a batch, you’re ensuring a consistent vacuum pressure and heat seal across all items, which is vital for optimal preservation.
- Efficient Workflows: Organize items based on their type and moisture content. For instance, separate meats, which have high moisture, from dry items like grains. This helps in setting the vacuum sealer to appropriate modes (if available) for wet or dry sealing.
- Heat Seal Consistency: Continuous use of the vacuum sealer can lead to heat buildup, potentially affecting the quality of the seal. It’s essential to monitor the machine’s temperature and give it short breaks if necessary.
Storing Sealed Foods: Best Practices for Fridge, Freezer, and Pantry
Biochemical Processes in Stored Foods: Even in a vacuum-sealed environment, biochemical reactions can still occur, albeit at a reduced rate. Enzymatic browning, lipid oxidation, and microbial growth are some processes that can affect the food quality.
- Labeling for Efficient Rotation: Using a FIFO (First In, First Out) system ensures older items are consumed first. Date and content labeling assist in this system’s implementation.
- Fridge Dynamics: Cold air in fridges tends to settle at the bottom. Placing items requiring colder temperatures, like raw meats, at lower shelves, can be beneficial.
- Freezer Burn and Its Prevention: Freezer burn occurs due to sublimation of ice crystals in food, leading to dry spots. A perfect vacuum seal significantly reduces the chances of this phenomenon.
- Pantry Storage and Residual Oxygen: Even the best vacuum sealing might leave trace amounts of oxygen. Using oxygen absorbers in sealed bags containing dry goods can further improve their shelf life.
Using Attachments: Enhancing the Functionality of Vacuum Sealers
Preservation Beyond Bags: Modern vacuum sealers often come with a range of attachments, broadening their utility beyond just sealing bags. These attachments leverage the fundamental principle of vacuum sealing but apply it to different containers.
- Jar Sealers and the Importance of Vacuum: Glass jars are impermeable, making them perfect for vacuum sealing. When using jar sealers, ensure a perfect seal on the lid to maintain the vacuum. This method is especially useful for foods that can benefit from a rigid structure, like pickles or certain fruits.
- Bottle Stoppers and Liquid Preservation: Oxidation is a primary spoilage mechanism for wines. By using bottle stoppers, the oxygen inside the bottle is removed, slowing down the oxidation process and preserving the wine’s flavor and aroma profiles.
- Hose Attachments and Canister Sealing: Large canisters can store bulkier items or liquids. When using hose attachments, ensure the canister is made of materials that can withstand the vacuum pressure without deforming.
Safety Precautions and Best Practices
The efficacy of a Food Saver vacuum sealer doesn’t just hinge on its operational prowess, but also on the user’s adherence to safety and best practice guidelines. By understanding and implementing these measures, users can ensure optimal functionality, longevity of the device, and, most importantly, their safety.
Do’s and Don’ts: Navigating Common Mistakes
- Do’s:
- Routine Inspection: Prior to each utilization, meticulously inspect the sealing strip and gasket. Ensure there’s no wear or foreign debris that could compromise the sealing process.
- Appropriate Bag Selection: Utilize only manufacturer-recommended or compatible bags. This ensures efficient sealing and prevents potential machine damage.
- Allocate Sufficient Space: During the bag-filling process, always allocate a minimum of 3 inches at the top. This not only facilitates effective sealing but also prevents undue strain on the machine.
- Don’ts:
- Overfilling: Overloading bags can hinder the sealing process and exert undue pressure on the machine, risking potential damage.
- Direct Liquid Sealing: Avoid sealing liquids directly. Opt for pre-freezing or utilize specialized containers to prevent machine malfunction or compromised seals.
- Forcing Mechanisms: Should you encounter resistance while closing the machine’s lid, reevaluate the bag’s contents and positioning. Excessive force can lead to machine damage.
Handling the Sealed Bags: Prioritizing Integrity
- Strategic Storage: Store sealed bags in freezers or storage areas ensuring they are positioned in locations devoid of potential puncture risks. This maintains the integrity of the seal and the quality of the food.
- Cognizance of Sharp Edges: Foods with sharp edges or bones can compromise the bag’s integrity. Consider utilizing additional protective layers or double-sealing techniques for these items.
- Delicate Manipulation: During any reorganization or retrieval process, handle sealed items with utmost care to safeguard the seal and the bag from potential damage.
Electrical Safety: Commitment to Safe Operation
- Optimal Placement: The vacuum sealer should be positioned on a level, dry surface, ensuring it remains distanced from potential water hazards.
- Disconnection Protocol: Post-operation, it is imperative to disconnect the device from the power source. This minimizes the risk of inadvertent activation and potential electrical complications.
- Vigilance Against Liquid Spills: Should there be any inadvertent spills on or around the machine, it is paramount to disconnect it immediately. Undertake a thorough cleaning regimen before considering subsequent usage.
- Cord Maintenance: The power cord is a critical component. Periodic inspections are necessary to identify any wear or potential damage. If anomalies are detected, cease machine usage and consult a professional for replacement.
Maintenance and Troubleshooting for Your Food Saver Vacuum Sealer
Your Food Saver vacuum sealer is the key to food preservation and extended freshness. But like any appliance, it requires regular upkeep and occasional troubleshooting. Dive deep into the best practices to ensure your vacuum sealer remains in peak condition.
Regular Cleaning: Ensuring Your Vacuum Sealer’s Longevity
Why Clean Regularly?
Dirt, food particles, and moisture can reduce the efficiency of your Food Saver vacuum sealer. Regular cleaning ensures optimal sealing and vacuuming performance.
- Safety First: Always unplug the vacuum sealer before any cleaning procedure. Safety should never be compromised.
- Exterior Maintenance: Use a soft, damp cloth with mild soap to gently clean the machine’s exterior. This not only keeps it looking new but also prevents dust accumulation.
- Sealing Bar Care: The sealing bar can collect residue. For a strong seal every time, wipe it down after each use with a damp cloth.
- Vacuum Chamber and Gaskets: Detach the gaskets and wipe the vacuum chamber. A clean chamber ensures consistent vacuum strength. Keep gaskets free from food particles to guarantee a perfect seal.
- Drying: Moisture can be harmful. Thoroughly dry each component before reassembling and using the machine.
Replacing Parts: Maximizing Your Food Saver’s Efficiency
When to Replace?
Regular wear and tear can degrade the performance of your vacuum sealer. Keep an eye on crucial components to maintain its efficiency.
- Sealing Strips: If you notice inconsistent sealing, it might be time to replace the sealing strip. Only opt for genuine Food Saver sealing strips to ensure compatibility and performance.
- Gaskets: A weakened vacuum might indicate worn-out gaskets. Regularly inspect them, and if they appear compressed or damaged, it’s time for a replacement. Again, always choose genuine parts.
Troubleshooting Common Issues: Quick Fixes for Your Vacuum Sealer
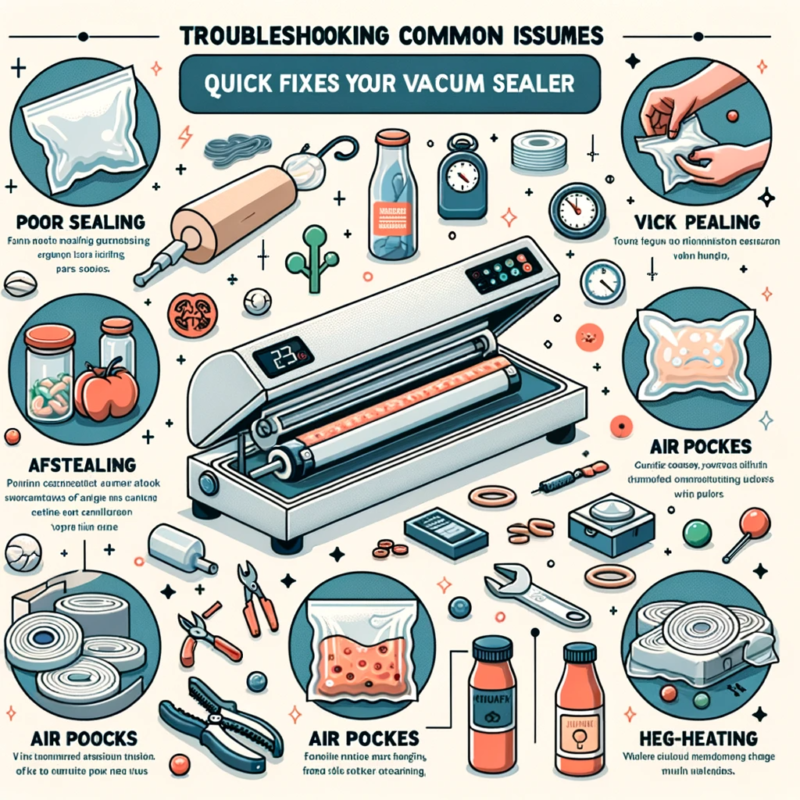
Every appliance has its quirks. Familiarize yourself with these common issues and their solutions to keep your Food Saver vacuum sealer running smoothly.
- Sealing Inconsistencies:
- Sealing Strip and Gasket Check: Regular wear can affect sealing. Inspect and replace if needed.
- Bag Integrity: Ensure the bag’s sealing area is free from moisture or food particles. A clean seal area is crucial for optimal sealing.
- Power Issues:
- Outlet Check: A simple but often overlooked step. Make sure the outlet is functional.
- Circuit Issues: A tripped breaker could be the culprit. Inspect your home’s electrical panel.
- Vacuum Strength Variations:
- Chamber and Gasket Cleaning: Regular cleaning can solve many vacuum issues. Keep them pristine for consistent performance.
- Bag Inspection: Small holes or punctures can reduce vacuum efficiency. Always inspect bags before use.
- Machine Overheating: Continuous use can cause overheating. Give your vacuum sealer a 20-minute break if it feels warm to the touch.
Expert Tips and Tricks
Advanced Sealing Techniques for Different Types of Foods
One of the fascinating aspects of a Food Saver vacuum sealer is its versatility. Depending on the food type, adjusting your sealing technique can optimize preservation.
- Meats and Fish: Before vacuum sealing meats or fish, always pat them dry with a clean paper towel. Excess moisture can not only interfere with the sealing process but can also lead to freezer burn. For delicate items like fish fillets, consider a brief pre-freeze. This short stint in the cold will maintain the item’s shape and ensure it isn’t compressed during the vacuum process.
- Fruits and Vegetables: Soft fruits, like strawberries or blueberries, can easily become mushy if sealed directly. Pre-freezing them individually on a tray keeps their integrity intact. For vegetables, especially the green ones, blanching before sealing is a secret weapon. This process locks in their vibrant color, ensuring your greens don’t turn brownish-grey over time.
- Liquids and Soups: A common challenge with vacuum sealing liquids, like broths or homemade soups, is avoiding spillage. The trick? Freeze them to a slushy consistency first. By doing this, you’re ensuring that your Food Saver vacuum sealer doesn’t inadvertently suck in and spill the liquids.
Increasing Shelf Life: Steps to Ensure Prolonged Freshness
Vacuum sealing is already a game-changer in food preservation. But did you know that combining it with other practices can further extend your food’s life?
- Storage Temperature: It’s crucial to ensure that your storage spaces are at optimal temperatures. A freezer should consistently maintain a temperature of 0°F (-18°C) or lower. Your refrigerator, on the other hand, should hover around 37°F (3°C). Investing in a good thermometer can make a difference in food preservation.
- Rotation System: Embrace the “first-in, first-out” philosophy. Vacuum-sealed foods, while lasting longer, still have an expiration. By consuming older items before newer ones, you’re ensuring freshness and minimizing waste.
- Labeling Practice: It might sound basic, but labeling your sealed items can be a lifesaver. Use a waterproof marker to note down the date of sealing and the food type. It simplifies tracking and ensures you’re always consuming foods at their peak.
Creative Uses: Beyond Food – Vacuum Sealing for Protection and Organization
Beyond the culinary world, the Food Saver vacuum sealer has a plethora of applications:
- Preserving Important Documents: Humidity and time can degrade essential papers. By vacuum sealing birth certificates, house deeds, or cherished old photographs, you’re safeguarding them against moisture, ensuring their longevity.
- Camping and Outdoor Adventures: Nature is unpredictable. Vacuum seal items like matches, first-aid kits, or even spare clothing. This ensures they remain dry and usable, even if you’re caught in a downpour.
- Efficient Organization: For hobbyists or DIY enthusiasts, tiny components like beads, screws, or craft supplies can become chaotic. Vacuum sealing them into categorized portions not only protects them from external factors but also makes storage efficient and clutter-free.
Conclusion
Sealing the Deal: Mastering how to use foodsaver vacuum sealer isn’t just about preserving food; it’s about savoring every bite and cherishing the flavors. Remember, the magic is in the details! Got a sealing success story or a nifty trick up your sleeve? We Food Vacuum Sealers love to hear from you. Share your experiences and let’s keep the food-saving revolution going strong!