The article titled “How To Charge Nest Thermostat” provides an informative guide on the necessary steps to charge your Nest Thermostat. From understanding the importance of maintaining a fully charged device to learning the specific process of connecting the thermostat to its base, this article offers a comprehensive explanation to ensure optimal functionality and efficiency of your Nest Thermostat. Whether you are a new user seeking guidance or an existing user experiencing battery-related issues, this article will equip you with the knowledge and instructions needed to successfully charge your Nest Thermostat.

Understanding Nest Thermostat
The Nest Thermostat is a smart device that helps regulate the temperature of your home. It is an innovative and user-friendly solution that not only allows you to control the temperature but also helps you save energy and lower your electricity bills. Understanding the key features and benefits of the Nest Thermostat will enable you to make the most of this efficiency-enhancing device.
About Nest Thermostat
The Nest Thermostat is designed to learn your temperature preferences and adjust accordingly, providing you with a comfortable indoor environment. It uses advanced sensors and algorithms to anticipate your heating and cooling needs, ultimately improving energy efficiency and reducing waste. The sleek design and intuitive interface make it easy to operate, even for those who are not tech-savvy.
Key Features of Nest Thermostat
The Nest Thermostat comes with several key features that make it stand out from traditional thermostats. One of its most distinguishing features is its ability to learn your temperature preferences and create a personalized schedule. It also offers remote control access via a mobile app, allowing you to adjust the temperature even when you’re not at home. Additionally, the Nest Thermostat integrates with other smart home devices and platforms, providing a seamless and integrated experience.
Benefits of Using Nest Thermostat
Using a Nest Thermostat offers numerous benefits. Firstly, it promotes energy efficiency by adapting to your schedule and adjusting the temperature accordingly, which can lead to significant cost savings on your utility bills. Secondly, the remote control functionality allows you to make changes from anywhere, ensuring you always come back to a comfortable home. Finally, the compatibility with other smart home devices and platforms enables a connected and convenient living experience.
Components of Nest Thermostat
To fully understand the Nest Thermostat, it is important to familiarize yourself with its components. The device consists of three main parts: the display unit, the base of the thermostat, and the battery compartment.
The Display Unit
The display unit of the Nest Thermostat is where you can view and interact with the device. It features a high-resolution screen that provides clear temperature readings and allows you to navigate through various functions.
The Base of Thermostat
The base of the thermostat is responsible for connecting the Nest Thermostat to your HVAC system. It serves as the link between the device and your home’s heating and cooling infrastructure.
The Battery Compartment
The battery compartment is where the Nest Thermostat’s battery is located. It is essential for powering the device and ensuring its continuous operation.

Technical Specifications of Nest Thermostat Battery
Understanding the technical specifications of the Nest Thermostat battery is crucial for knowing how to properly maintain and charge it. The following details provide insights into the battery type, life expectancy, and charging requirements.
Battery Type
The Nest Thermostat uses a rechargeable lithium-ion battery. This type of battery is known for its high energy density, long lifespan, and low self-discharge rate.
Battery Life Expectancy
The battery life of the Nest Thermostat varies depending on usage and settings. On average, it can last up to 10 hours without charging, but regular charging is recommended to ensure uninterrupted operation.
Charging Requirements
To charge the Nest Thermostat battery, it requires a power source. This can be either through a connection to the HVAC system, battery power, or a power stealing mechanism. Understanding the different powering options will help you determine the most suitable method for your specific needs.
General Thermostat Powering Options
The Nest Thermostat can be powered in three different ways: through a C-Wire connection, battery power, or a power stealing mechanism. Each option has its own advantages and requirements.
Powered With C-Wire
If your home has a C-Wire (common wire), you can directly connect the Nest Thermostat to your HVAC system for continuous power supply. This option eliminates the need for battery charging and ensures the thermostat is powered at all times.
Battery Powered
In cases where a C-Wire is not available, the Nest Thermostat can rely on its built-in battery for power. The battery provides temporary backup power and should be regularly charged to prevent energy loss.
Power Stealing Mechanism
The power stealing mechanism is an alternative method for providing power to the Nest Thermostat. It utilizes the temperature difference between the ambient air and the HVAC system to charge the battery. This method ensures continuous operation even in the absence of a C-Wire.
Understanding Nest Thermostat Power Needs
To understand the Nest Thermostat’s power needs, it is essential to grasp the role of the battery in its operation, the battery type used, and how the battery functions.
Nest Thermostat Battery Type
As mentioned earlier, the Nest Thermostat uses a rechargeable lithium-ion battery. This type of battery is chosen due to its reliability, long lifespan, and ability to hold a charge for an extended period.
How the Battery Functions
The battery in the Nest Thermostat acts as a power source when no external power supply is available. It ensures the device continues to function even during power outages or when the HVAC system is not in operation.
The Role of Battery in Nest Thermostat Operation
The battery in the Nest Thermostat plays a crucial role in maintaining uninterrupted operation. It powers the device’s internal components, such as the sensors and user interface, allowing the thermostat to continually monitor and regulate the temperature.
How Nest Thermostat Battery Charges Itself
To charge the Nest Thermostat battery, there are two common methods: charging via the HVAC system and self-charging through the power stealing mechanism.
Charging Via the HVAC System
When the Nest Thermostat is connected to the HVAC system through a C-Wire or alternative power source, it charges the battery automatically. This ensures a continuous power supply and eliminates the need for manual charging.
How Often Does Nest Thermostat Charge Itself
The Nest Thermostat typically charges itself whenever it is connected to a power source. However, the frequency of charging depends on the usage and power availability. Regular charging is advised to prevent the battery from running low.
Troubleshooting Low Battery Issues in Nest Thermostat
Recognizing and addressing low battery issues in the Nest Thermostat is crucial for maintaining its optimal performance. Understanding the symptoms, resolution steps, and replacement requirements will help you tackle low battery issues effectively.
Recognizing Low Battery Symptoms
When the Nest Thermostat’s battery is running low, you may experience symptoms such as frequent power loss, unresponsive buttons, or an inability to connect to the device remotely. These signs indicate that the battery needs to be charged or replaced.
How to Resolve Low Battery Issues
To resolve low battery issues, start by checking the power source connection and ensuring it is functional. If the power source is intact, try manually charging the Nest Thermostat using a compatible USB cable. If the problem persists, it may be necessary to replace the battery.
When to Replace Nest Thermostat Battery
The Nest Thermostat battery has a long lifespan, but there may come a time when it needs replacement. If the battery no longer holds a charge or exhibits signs of deterioration, it is recommended to replace it with a new one to maintain the device’s performance.
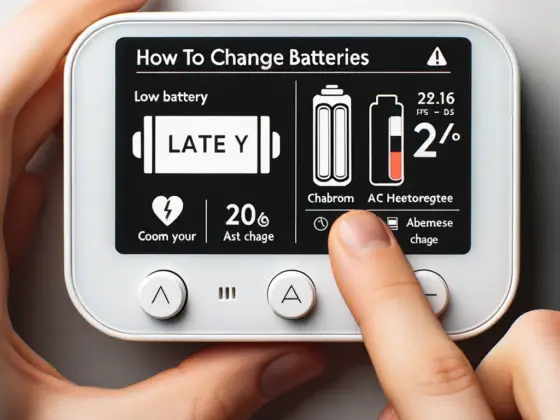
Nest Thermostat Charging Indicator and Settings
The Nest Thermostat provides charging indicators and settings to help you monitor and control the battery. Understanding how to identify the charging symbols and navigate the battery settings is essential for optimal usage.
Identifying Nest Thermostat Charging Symbols
The Nest Thermostat uses various symbols and indicators to denote its charging status. These symbols can be found on the device’s display unit and provide information on the battery’s current charging level.
Navigating the Battery Settings on Thermostat
To access the battery settings on the Nest Thermostat, navigate through the device interface and locate the appropriate menu. From there, you can view and adjust settings related to battery usage, charging preferences, and notifications.
How to Manually Charge Your Nest Thermostat
In certain situations, it may be necessary to manually charge the Nest Thermostat. This can be done using a USB cable and following the proper precautions to ensure safety and efficient charging.
Charging Nest Thermostat with USB
To manually charge the Nest Thermostat, connect a compatible USB cable to the device and a power source. Ensure the power source provides an adequate current and voltage to charge the battery effectively.
Precautions While Manually Charging
While manually charging the Nest Thermostat, it is important to take necessary precautions. Avoid using low-quality or damaged cables, and always follow the manufacturer’s instructions to prevent any risk of electrical damage or hazard.
Pro Tips for Prolonging Battery Life of Nest Thermostat
To maximize the lifespan of your Nest Thermostat battery, there are several pro tips you can follow. These tips include maintaining optimal thermostat settings, periodic battery clean-up, and regular inspection of the HVAC system.
Maintaining Optimal Thermostat Settings
Setting the Nest Thermostat to energy-saving modes and avoiding unnecessary temperature fluctuations can help prolong the battery life. Avoid excessive heating or cooling demands and utilize the device’s learning capabilities to optimize energy usage.
Periodic Battery Clean-up
Dust and debris accumulation can affect the performance and battery life of the Nest Thermostat. Regularly cleaning the device, especially the charging contacts and battery compartment, will prevent any hindrance to charging and ensure efficient battery operation.
Regular Inspection of HVAC System
A well-maintained HVAC system is crucial for the optimal performance of the Nest Thermostat. Regularly inspecting and cleaning the HVAC system components, such as filters and vents, will enhance the overall efficiency and reduce strain on the thermostat’s battery.
By understanding the components, technical specifications, power needs, and charging methods of the Nest Thermostat, you can effectively operate and maintain this innovative smart device. Following the pro tips for prolonging battery life will ensure a seamless and energy-efficient experience, allowing you to fully enjoy the benefits of the Nest Thermostat in your home.