In this article, you will learn the step-by-step process of changing batteries in a thermostat. As the power source of a thermostat, maintaining fresh batteries is crucial for optimal functionality. By following these simple instructions, you will be able to easily replace the batteries in your thermostat and ensure that your heating and cooling system continues to operate efficiently.
Understanding Your Thermostat

Thermostats are essential devices for controlling and regulating the temperature in your home or office. Understanding the different types of thermostats and their functionalities is crucial in efficiently managing your HVAC system.
Types of thermostats.
There are several types of thermostats available in the market, including programmable, non-programmable, smart, and battery-powered thermostats. Each type has its unique features and functions that cater to specific needs and preferences. It is essential to identify the type of thermostat you have to accurately perform battery replacement.
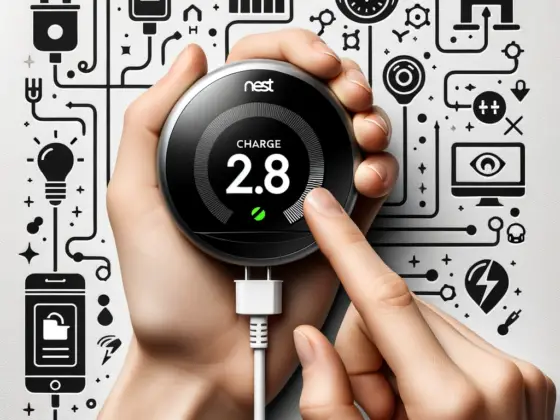
Recognizing a battery-powered thermostat
Battery-powered thermostats are typically characterized by a digital display and buttons or touch screen controls. Unlike other types, these thermostats rely on batteries to power their operations instead of being wired directly into your HVAC system. If your thermostat has a separate battery compartment, it is most likely a battery-powered model.
Signs your thermostat batteries might be low
It is important to recognize the signs that indicate your thermostat batteries might be running low. Some common indications include an unresponsive or flickering display, a backlight that is dimmer than usual, or the thermostat not maintaining the desired temperature consistently. If you notice any of these signs, it is likely time to change the batteries to ensure optimal functionality.
Safety Precautions Before Starting
Before you begin the battery replacement process, it is crucial to prioritize safety. Taking the following precautions will protect you and prevent any potential damage to your thermostat or HVAC system.
Turning off the power
To avoid electric shock or damaging the thermostat, it is essential to turn off the power supply to your HVAC system. Locate the circuit breaker dedicated to your heating and cooling system and switch it off. This will ensure that there is no power flowing to the thermostat during the battery replacement process.
Understanding thermostat wires
Take the time to familiarize yourself with the wiring of your thermostat. Although battery replacement does not involve manipulating the wiring, it is always good practice to have a basic understanding of how the wires are connected. This knowledge will come in handy during troubleshooting or future installations.
Using appropriate tools
Ensure you have the necessary tools before starting the battery replacement process. This typically includes a small screwdriver for removing the thermostat cover and any other tools specified in the manufacturer’s instructions. Using the correct tools will make the process easier and minimize the risk of damage to your thermostat.
Locating the Battery Component
To change the batteries in your thermostat, you need to locate the battery compartment. Here’s what you need to do:
Identifying the battery compartment
Inspect your thermostat for a small compartment or a designated area that houses the batteries. This may be located on the back, bottom, or side of the device, depending on the thermostat’s design. Refer to the manufacturer’s instructions if you are having difficulty locating the battery compartment.
Removing the thermostat cover
Before accessing the battery compartment, you will need to remove the cover of your thermostat. This usually involves loosening screws or using a small lever to detach the cover. Be gentle while removing the cover to avoid any damage to the thermostat.
Different thermostat designs and battery placements
Note that the design and battery placement may vary depending on the model and manufacturer. Some thermostats may have the battery compartment integrated into the main body, while others may have a separate compartment with a removable cover. The manufacturer’s instructions will provide specific guidance on accessing and removing the batteries for your particular thermostat model.

Removing the Old Batteries
Once you have accessed the battery compartment, follow these steps to safely remove the old batteries:
How to safely remove the batteries
Inspect the battery compartment to determine how the old batteries are secured in place. Some thermostats may have a spring-loaded mechanism that needs to be released, while others may have a simple slide-in and slide-out mechanism. Gently remove the old batteries, taking care not to apply excessive force or damage the contacts.
Becoming aware of battery orientation
Take note of the orientation of the old batteries before removing them. Understanding the correct position of the positive (+) and negative (-) terminals will help you insert the new batteries correctly. Many thermostats have markings or diagrams inside the battery compartment that indicate the correct orientation.
Handling of used batteries
Properly dispose of the used batteries in accordance with your local regulations and guidelines. Used batteries can be harmful to the environment if not handled and disposed of correctly. Many communities have designated recycling centers or drop-off points for household batteries, so be sure to explore these options.
Choosing the Right Batteries

Selecting the appropriate batteries for your thermostat is essential for reliable performance and extended battery life. Consider the following factors when choosing replacement batteries:
Types of batteries suitable for thermostats
Most thermostats require AA or AAA batteries. However, some models may have specific battery requirements, such as lithium or rechargeable batteries. Refer to the thermostat’s user manual or the manufacturer’s instructions to determine the exact battery type recommended for your thermostat.
Observing the size of your thermostat’s batteries
Ensure that the replacement batteries match the size requirements of your thermostat. AA and AAA batteries are the most common sizes used, but other thermostat models may have different size specifications. Using batteries that are too small or too large can result in improper fit and may affect the functionality of your thermostat.
Factors in choosing a quality battery
Opt for reputable battery brands known for their reliability and longer lifespan. High-quality batteries not only provide better performance but also reduce the frequency of battery replacements. Consider factors such as the battery’s shelf life, capacity, and reviews from other users when making your selection.
Installing the New Batteries
After selecting the appropriate batteries, follow these steps to install them correctly:
Proper battery orientation
Before inserting the new batteries, confirm the correct orientation by referring to the markings or diagrams inside the battery compartment. Align the positive (+) and negative (-) terminals of the batteries with the corresponding terminals in the compartment.
How to carefully insert the new batteries
Gently slide or place the new batteries into the battery compartment. Ensure that the batteries fit securely and flush against the contacts. Take care not to exert excessive force, as this can damage the contacts or the battery compartment itself.
Confirming successful installation
Once the new batteries are inserted, double-check their orientation and positioning. Make sure the batteries are making proper contact with the contacts in the compartment. Inspect the battery compartment cover to ensure it is securely fastened before proceeding.
Reassembling the Thermostat
After successfully installing the new batteries, follow these steps to reassemble your thermostat:
How to put the thermostat cover back
Align the thermostat cover with the main body and gently press it into place. Make sure the cover sits flush and there are no loose or protruding parts. If the cover is secured by screws, use the appropriate screwdriver to tighten them.
Ensuring all parts are correctly placed and secure
Inspect the thermostat to ensure that all components are in their proper positions. Check for any loose wires, buttons, or sensors. The thermostat should be securely assembled and free from any visible defects or loose parts.
Staying aware of wires and components during reassembly
Exercise caution when reassembling the thermostat, especially if there are wires or other delicate components within the device. Take care not to pinch or damage any wires while putting the cover back in place. If you are unsure about the position of any components, consult the manufacturer’s instructions or seek professional assistance.
Checking the Thermostat’s Functionality
Once you have reassembled the thermostat, it’s time to check its functionality:
Turning back on the power
Go back to the circuit breaker panel and switch on the power supply to your HVAC system. This will restore power to your thermostat and allow you to test its operation.
Confirming thermostat operation
Observe the thermostat display to ensure it powers on correctly. Check if the display is clear, backlit (if applicable), and responsive to your commands. Test different thermostat functions, such as adjusting the temperature, mode selection, or fan control, to ensure they are functioning as expected.
Testing the thermostat’s responses to settings
To further verify your thermostat’s functionality, set different temperature targets and observe if the HVAC system responds accordingly. The heating or cooling system should activate in response to your temperature settings. If the thermostat fails to control the HVAC system properly, there may be underlying issues that need to be addressed.
Troubleshooting Post-Battery Installation
In case your thermostat still doesn’t work as expected after battery replacement, follow these steps to troubleshoot the issue:
What to do if thermostat still doesn’t work
First, double-check the battery installation to ensure correct orientation and proper contact with the terminals. Confirm that the battery compartment cover is securely fastened. If the thermostat still doesn’t work, try removing and reinstalling the batteries. This can help reset the thermostat’s internal circuitry.
Investigating other possible issues
If the above steps do not resolve the issue, check for any loose or damaged wires connected to the thermostat. Ensure that the HVAC system is receiving power by checking the circuit breaker and any relevant switches. If you notice any loose connections or damaged wires, it is advisable to consult a professional HVAC technician for further assistance.
When to call a professional
If you are unable to troubleshoot or resolve the issue on your own, it may be time to call a professional HVAC technician. They have the expertise and tools to diagnose and repair any underlying problems with your thermostat or HVAC system. Hiring a professional ensures that any technical issues are handled correctly, minimizing the risk of further damage.
Maintaining Your Thermostat’s Battery Health

To ensure the optimal performance and longevity of your thermostat’s batteries, consider the following maintenance practices:
Regular checking and replacement schedule
Regularly check the battery status on your thermostat and replace them as needed. It is a good practice to inspect the batteries at least once every six months. However, if you notice any signs of low battery, such as a dim display or erratic thermostat behavior, check the batteries sooner.
The impact of usage on battery life
Heavy usage, such as frequent adjustments of temperature or extended operation of the thermostat’s backlight, can drain the batteries faster. If your thermostat requires wired or wireless network connection, it may also consume more battery power. Adjusting usage patterns and reducing unnecessary power consumption can help prolong battery life.
Keeping reserve batteries and foresight on issues
To avoid unexpected disruptions due to battery failure, always keep spare batteries on hand. This allows for immediate replacement if your thermostat batteries unexpectedly run low. Additionally, staying proactive by anticipating potential issues and monitoring battery performance will help you address any problems promptly, ensuring uninterrupted use of your thermostat.
In conclusion, understanding your thermostat, observing safety precautions, correctly installing new batteries, and maintaining regular battery health checks are crucial steps to ensure the optimal functionality of your thermostat. By following these best practices, you can effectively manage your home or office’s temperature control while minimizing the risk of any battery-related issues. Remember, if you encounter any difficulties or are unsure about any steps, it is always best to consult the manufacturer’s instructions or seek professional assistance.